Carnival masterboard with Suzz
Suzz here, and when I think of the carnivals I think of bright bold colors. I wanted to share how to create a masterboard and create multiple projects from the masterboard using the bright colors of the carnival.
Start with a piece of white cardstock.
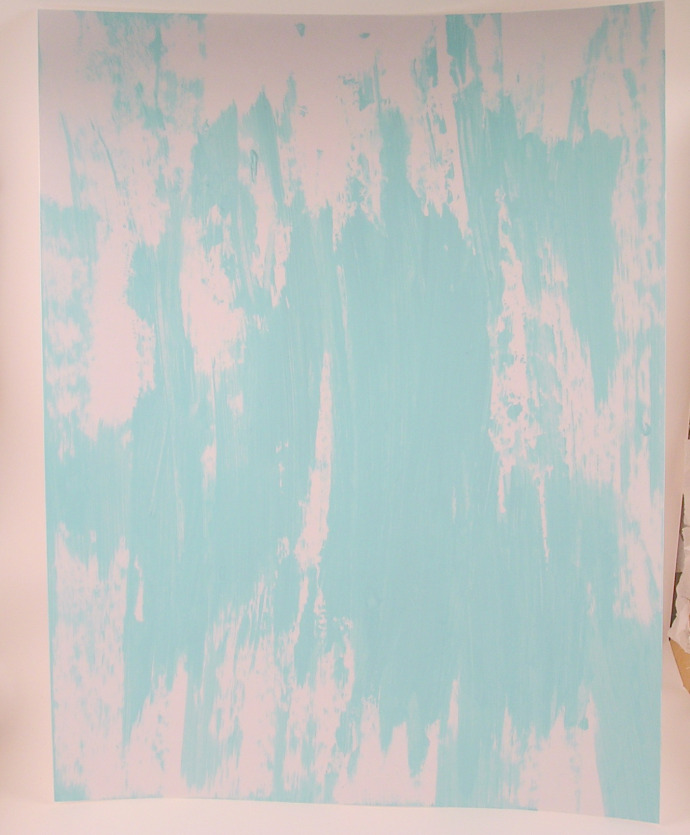
Smear a layer of light blue acrylic paint.
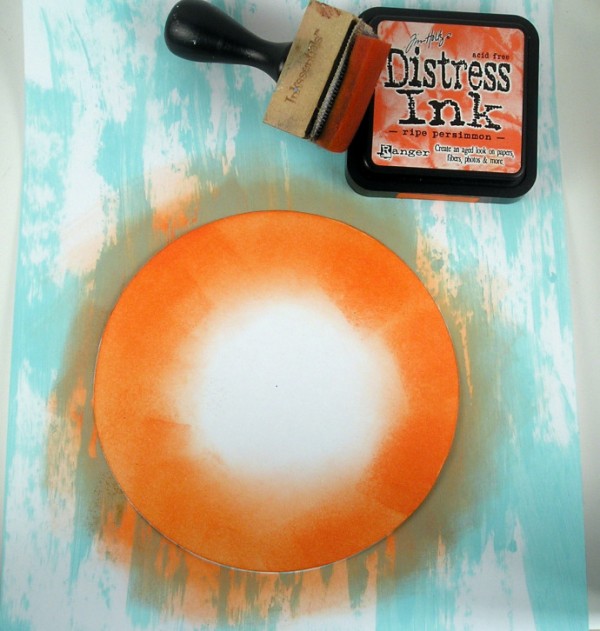
Lay down a circle as a mask and sponge the orange dye ink around the edges.
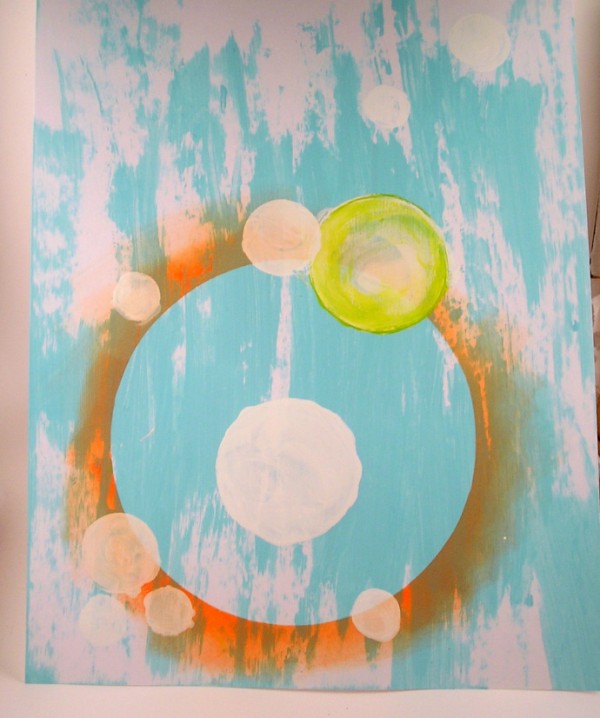
Cut circles from a scrap piece of cardstock. Use the scrap paper ask a mask to paint white circles randomly across the surface. After they dry lay mask over the circle and add additional colors either with paint or dye inks sponged over the white circles.
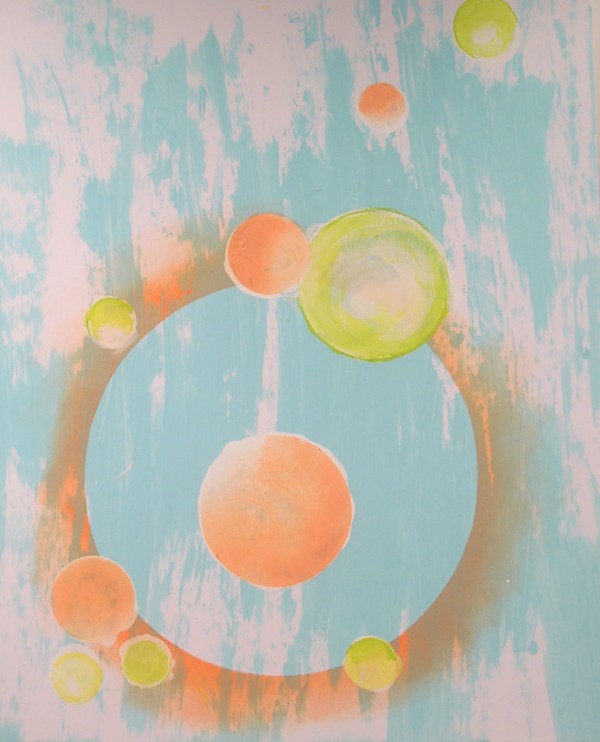
Add additional stamping using the mask to keep the stamping inside the circles. Ink up dots stamps and randomly stamp sections with the dots.
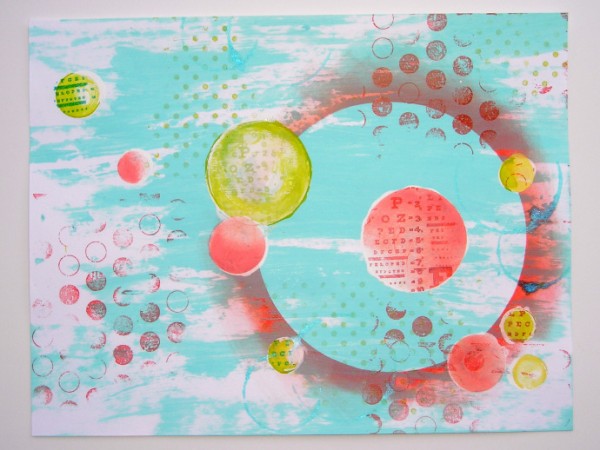
Now you have a finished masterboard that you can cut to desired shapes and sizes.
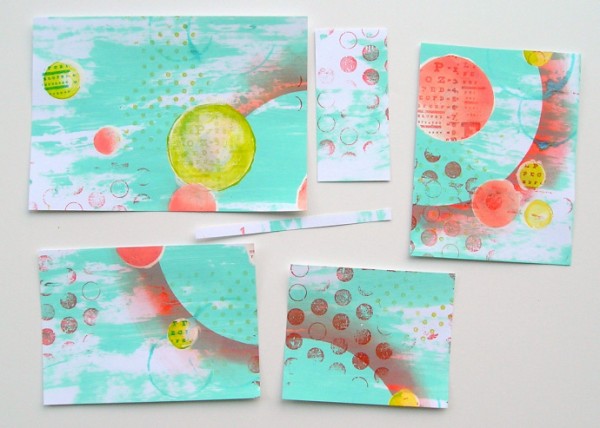
I start with picking out sections of the pattern that I want for cards. I cut them first and then use the remainders for accents on the cards or for tags. Here is what I did with this background.
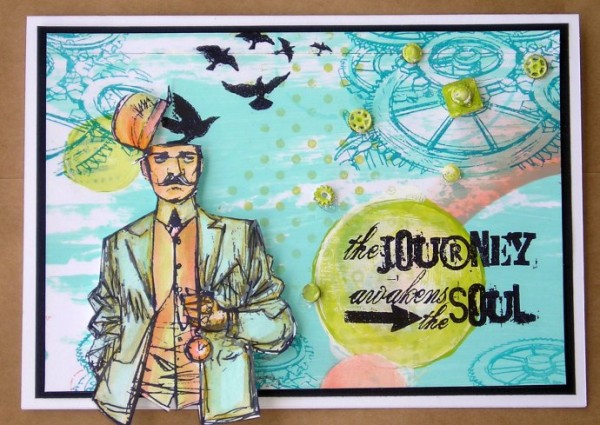
I cut this background first as my largest background piece based on the location of the big circle and the circles. I looked at what the effect was and thought it looked like a futuristic background. That triggered the thought of a time traveler and I pulled images to go with that theme.
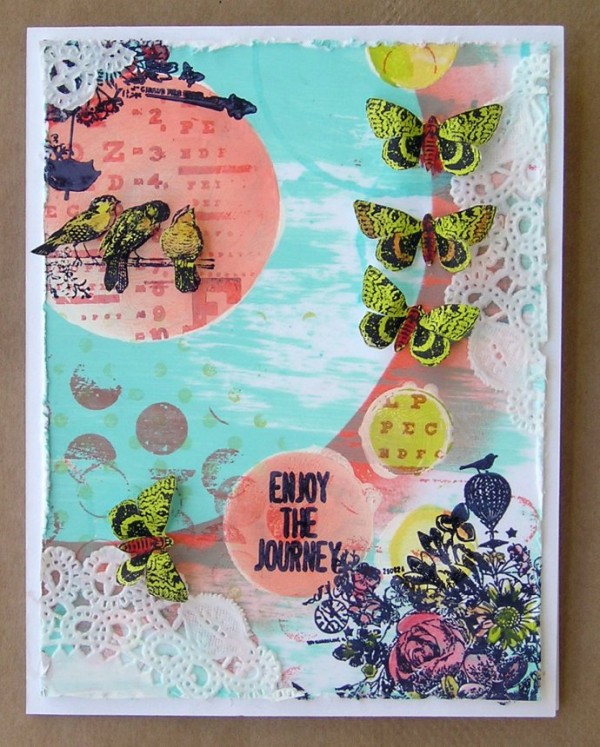
This was the second background cut from the masterboard. I accented the line of the large circle and added doily pieces to soften the circles.
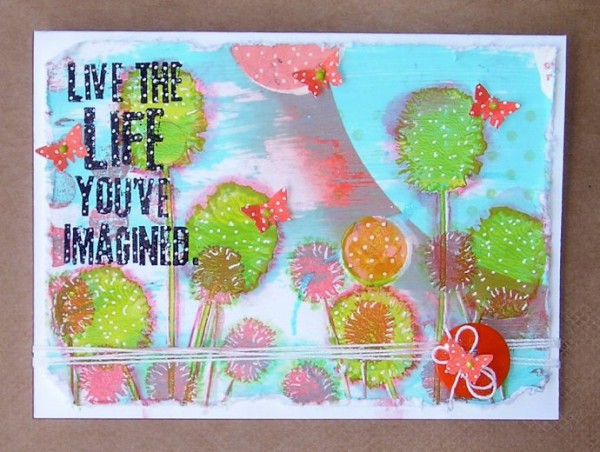
I wanted to continue with the circles and pulled out flowers that followed the shapes and even accented my sentiment with polka dots too!
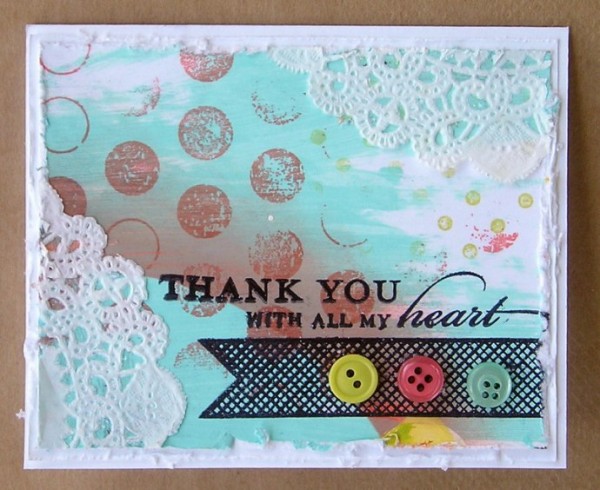
A smaller piece of the background to make a quick and easy thank you card.
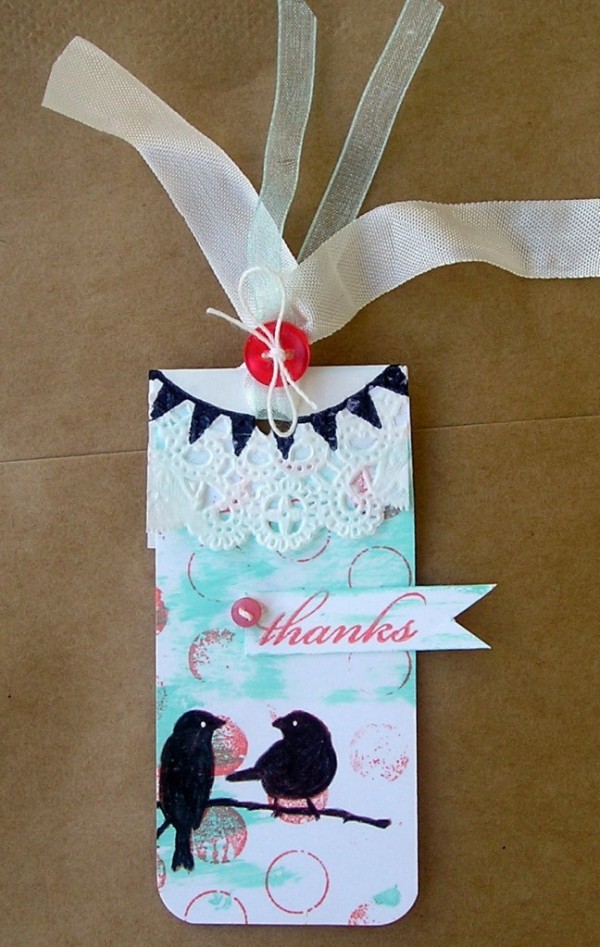
My final project a tiny tag that can be added to a gift for a frilly delicate touch.
Supplies Used: PaperArtsy Fresco Finish – LimeLight, Mermaid, Snowflake, Hero Arts Life of the Party Dots, Hero Arts Polka Dots, Inkadinkado – Branchful of Birds, Bo Bunny Doily, Ranger Distress Ink – Ripe Persimmon, Ranger Archival Ink – Black, Simon Says Stamp -Beautiful Words, Ranger Archival Ink – Rose Madder, LilyBee Design – Picket Fence, DarkRoom Door – Bold Blossoms, Visual Artistry – Lifes Possibilities, White Twine, Buttons, Pearls, Visual Artistry – City Central, Stampendous Butterflies, Stampendous BlueBird Branch, Stampers Anonymous – Travelers, Prima Gears

Thanks to Suzz for sharing! This is such a great idea and it combines free-for-all play with making something that can be cut up and used in so many ways. I love this idea so very much!
Want to hop in on the party? Then join us in this week’s challenge! For the full rules, read the “challenge rules” posted in the side-bar here on our blog, and be sure to enter the challenge in the post below this one.
Challenge Badge

Spotlight Badge


Fabulous master board Suzz. As you say it has a futuristic look and reminds me of planets. Love how you broke it down to take advantage of certain areas for your various projects which are all so different but equally effective. Wonderful inspiration as always. Hugs Lesley Xx
Love your masterboard technique Suzz, the colours are fabulous and the background really does have a futuristic look/planets. Love how you cut it down into smaller pieces to create each miniature piece of art, each one a masterpiece. Love tham all. Thanks for the tutorial. Tracy x x
Love your masterboard technique. The cards are fabulous. Thank you
for sharing.
Absolute pleasure to see your creation, Suzz. Love love love them.
nagaonkarshilpa.blogspot.in
Beautiful and creative…I can see why you are on the design team…stunning!!
What a neat idea to create a master board! Beautiful work, Suzz!
What a wonderful idea…love the cards you have made! Great designs and so unique.
Joyce xx
Wow! I never heard of a master board and I love this idea. At first I didn’t see where you were going with this, but when you cut it up and made cards, I was amazed at how it all came together. Love these finished products!
Such a great technique, thank you for sharing it.
What a fabulous technique, and so many unique projects from just one board! :)
AWESOME projects!
Fabulous masterboard Sue, love the colors! Thanks for sharing your creative process!
Very Cool! Thanks for the tutorial! I’m going to do this tonight! :)
This is very cool! Love the background Suzz created and the tutorial is awesome! <3 Candy
You have created so much from this one masterboard, I must have a go at this technique again… Gorgeous colours, and I love all the results.
Great masterboard, super colors and delightful cards using the above mentioned technique.
Carole
Wow, I loved your masterboard but then the cards and tags you made are just amazing. What a great idea to make a large background. I rarely do this. Note to self – Think BIG……
Fab-u-lous!!!
Great idea, I love the bright colors and how each piece is unique.
Wow Suzanne! What an awesome tutorial! TFS :)
Superb! Great techniques, beautiful results!
Fabulous masterboard Sue! Great technique and I love all the different projects you created with it. Love the birds flying out of the time travelers head!!
Great projects! I love to make backgrounds and than start to use them and you made them so beautiful… Inky greetings, Gerrina
Wow! I love how you did and used the master board. Wonderful projects! Thanks so much for sharing. :-)
this is so fabulous! Thanks for such a great tutorial!
Wow…. those colors are amazing! Thank you for the great tutorial! :)